Creating E-Receipt
In SutiExpense, you can create an e-receipt if you had lost or don't have a receipt to attach to an expense line item.
|
Note: This feature can be turned on/off by your administrator.
|
To Create an E-Receipt
- On the Expenses menu, click Drafts.
- The Drafts page appears displaying the list of expense reports which have been created but not yet sent for approval.
- Click on the particular expense report name or on the
icon.

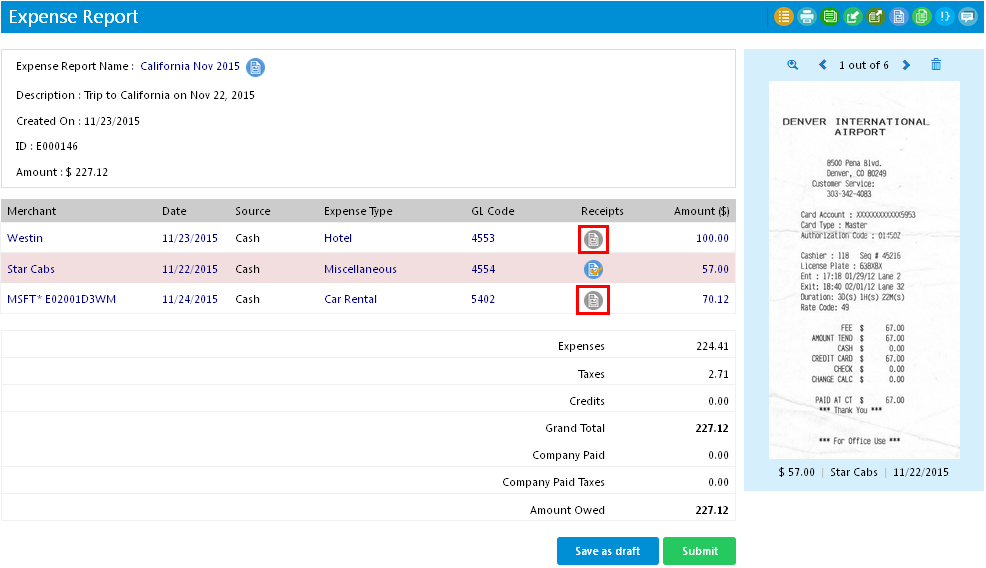
- The Expense Report screen opens displaying the list of expense line items added to it.
- Click on a particular
 icon.
Note: If a line item contains
 icon, it represents that a receipt has already been attached to it. To attach receipt, you can also drag and drop receipt on the right to the particular line item on the left.

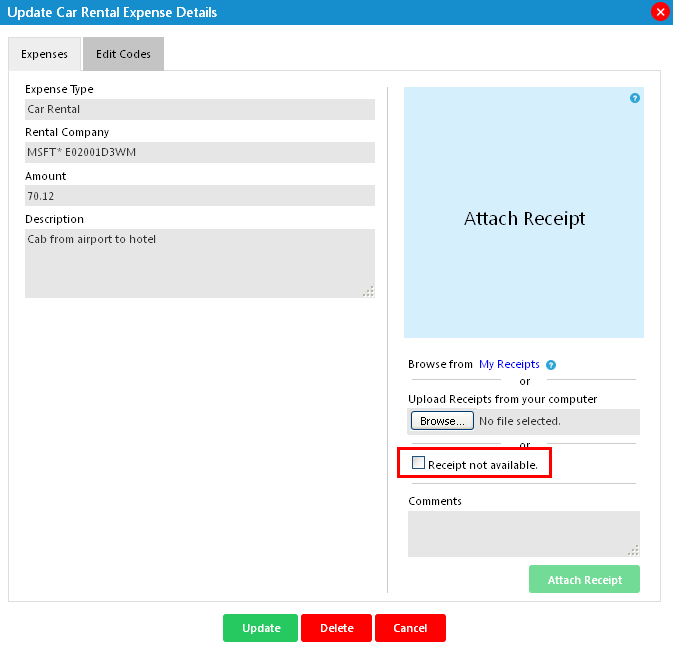
- An Update [Line Item] Expense Details window opens.
Note: Line Item refers to the expense name.
- To create an e-receipt:
- Select the 'Receipt not available' checkbox option. You will observe that the Attach Receipt button (below the Comments field) becomes active and the Update button (at the bottom of the page) becomes inactive.
- Click on the Comments field (highlighted in the below screenshot).

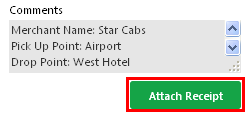
- Enter the Comments in the field and click on Attach Comments.

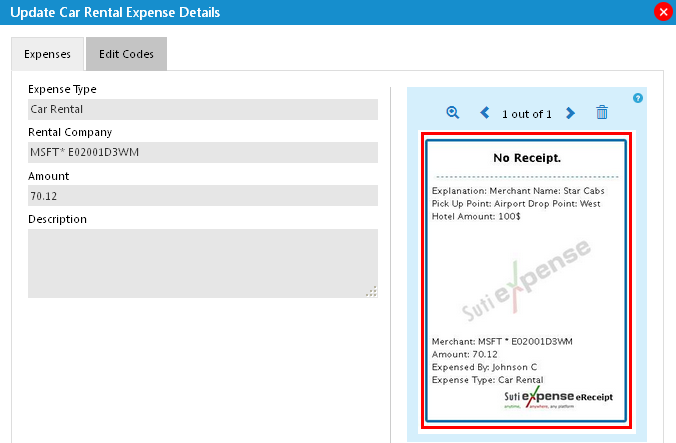
- An e-receipt will be created and displayed on the right hand side with the data you entered (highlighted in red in the below screenshot).

- Click Update at the bottom of the window to update the details.